|
PROJECTS
for Stampers Season Class
ON
April 3, 2010
|
Projects at-a-glance for April 2010 |
|
 |
 |
|
 |
 |

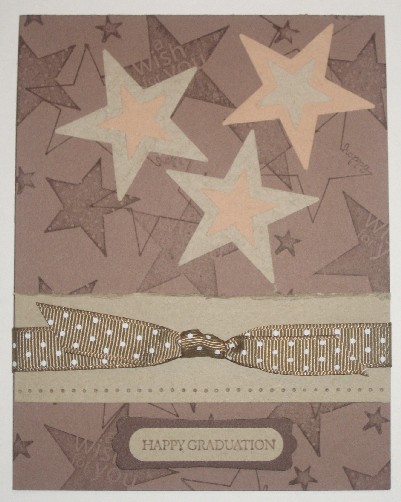
"FAUX
SUEDE"
STAR-STUDDED
CARD
|
Project
Notes:
  
PUNCHED STARS: The
stars are made with the Faux Suede technique. Click on the
screen shot here to go to Dawn's tutorial and see how Faux Suede is
done! It's very easy ~ and kind of surprising!!!
By the way, I have included more
stars in your kit than you will actually need, for in case you mess
up
one (it's easy to pull off a tip of a star, since it's so tiny; so
just be careful),
or in case you want to mix up your colors more, or in case you
want to add a star or two to your envelope or the inside of your
card, and/or in case you want to do four instead of three stars.
(The prototype below has
four; I preferred the look of three, but you're
welcome to do four if you want!)
LOWER BAND:
Two techniques are used on the kraft band: The top edge of it was "roughed
up" with the cutter tool (or you can use serrated knife (the less
sharp, the less likely you are to cut yourself), and then a row of holes are made with the paper piercing
tool and template along the bottom edge of it.
TYING THE KNOT:
There are two great knot-tying tutorials
on
this web page. The first one, where you tie your ribbon
around the top of a bottle, is really fun and different, and uses
the least amount of ribbon ~ if you're into saving that!
However, to get longer tails on your tie, instead of tying it around
the very top of the bottle, you'd tie it around either the middle
part, or the widest part. (Be sure to add more ribbon, since
it will use more ribbon.) Just take a look at her directions
and this will make sense.

BACKGROUND:
I stamped my card with different
star stamps. The prototype card below used a wheel, but I don't
have that, so I just ad-libbed with what I had. ...
Dawn added white gel pen dots. Since mine is a lighter brown,
I didn't; but they look neat on hers!
SENTIMENT:
I gave you a few options, already
punched with the Window Punch, so that you
could make your card for a birthday, graduation, or Father's Day!
|
Here is
the original prototype:

(I
actually prefer this color scheme to the one
I chose.
I did the prep for this card away from home
and
accidentally grabbed the wrong color, but didn't realize
it till it
was already all cut up, and didn't want
to change
it at that point.)
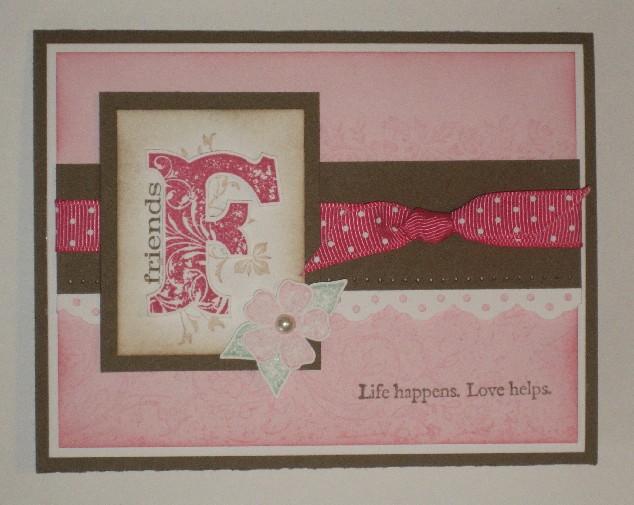
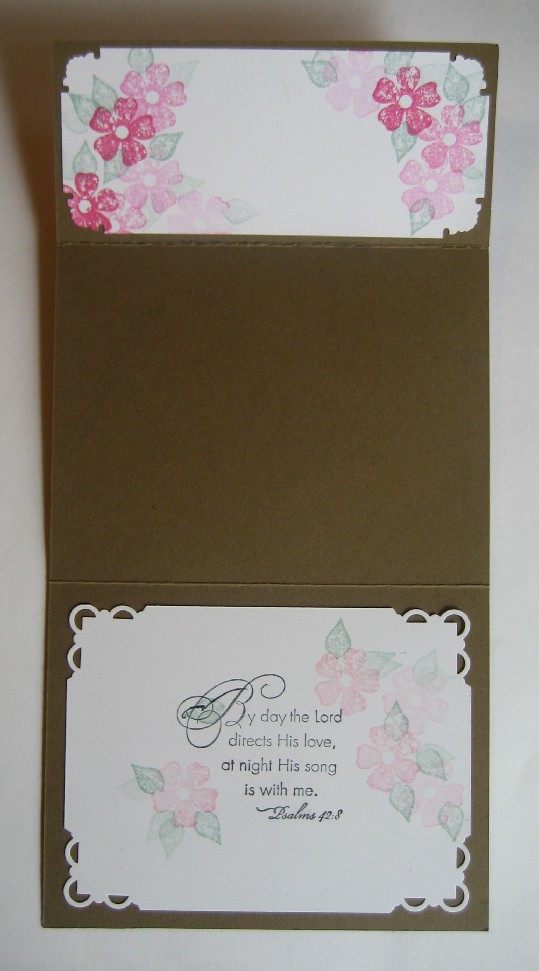
"VINTAGE
VOGUE"
PERFORATED BOOKMARKER
CARD
Here's
the card with the top pulled open:

I did the
same sentiment (a scripture) for the inside
of
the card and the bookmarker so that the recipient would have the
same
thing in both places, since it will be separated.
This ~
directly below ~ is the back of the bookmarker,
where I
will write my personal note:
|
Project
Notes:
THE LARGE CUT-OUT "F": Stamp
onto white, then cut all the way around leaving a narrow margin.
THE BACKGROUND OF THE "F":
I have stamped a few for you to cut out
and adhere with either glue or, if you want it to pop, use
dimensionals ~ on maybe even just one flower, so it overlaps a
smaller one. Most of these flowers were stamped, but again, I
couldn't stamp them without doing the whole card for you, cuz the
oval would have had to be sponged first. ( I stamped more
flowers than you probably need for the card, so you may want to save
a flower or two for the envelope!)
THE FLOWER ON THE LOWER RIGHT
CORNER: Stamp this
onto white CS, then cut out leaving a tiny margin of white all the
way around it. Same with the leaves. There's a pearl in
your kit to add to the center!
THE SOFT SUEDE WIDE BAND:
Punch little holes across the bottom
using the paper piercing tool.
THE RIBBON ON THE BAND:
The tutorial for tying a knot is on
this web page ~ the first one. (There's another one right
below this, but I prefer the first one.)
THE STAMPING ON THE MAIN PINK PIECE:
Stamp the longer scrolly stamp with a
line across it (from the Vintage Vogue set) in "Pretty in Pink."
(If you want it more pronounced, then use Cameo Coral.) They
stamped the lower half with a Stampin' Around roller, but I don't
have that, so I just used the ivy-ish stamp, and did a few of them.
THE SENTIMENT IN THE LOWER RIGHT
CORNER:
This is also in the set, and I stamped
it in Soft Suede.
THE WHITE SCALLOPED TRIM BELOW THE
BAND:
Punch it all the way across and adhere
to the bottom of the Soft Suede piece. I trimmed it first so
that it would not show behind the row of punched holes on the Soft
Suede piece.
|
Here is
the original prototype:
.jpg)
I
actually like the color of the "F"
and the
ribbon more in this
card ~ Rose Red ~ but I was out of
this
ribbon, so I went to Melon Mambo instead.
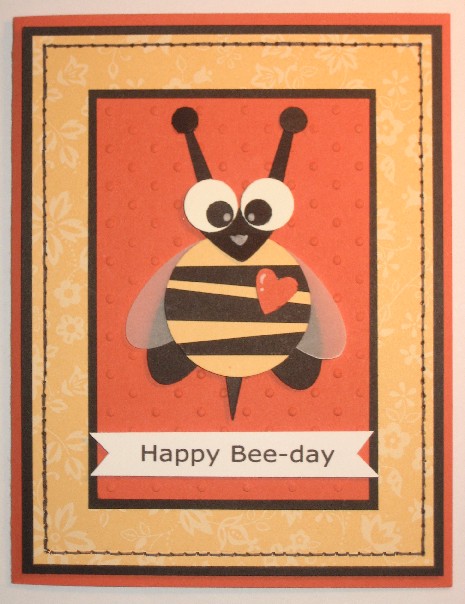
PUNCHED
BUMBLE BEE
CARD
|
Project
Notes:
DOTTED TANGERINE TANGO PIECE: This
is already done for you! I ran it through the dotted embossing
folder.
THE BEE:
Let's take each part of it, one by one:
Body: Take the
larger black circle and cut a few pieces, non-parallel, out of the
middle of it. Place them on the bee's middle, which is the
apricot (or maybe it's "So Saffron") circle (the black stripes will be wider than the bee), and once you get
them arranged how you like, glue them on, then turn the apricot circle over
and trim off the edges of the black stripes using the edge of the
apricot as your guide.
Heart: Already
punched for you. Use a white gel pen to draw the two little
marks you see in the picture.
Wings: I didn't like
the black I used for mine (above), so I made yours grey instead.
... Look at the
card samples (above or below) to see how to arrange these ~ though
you can certainly do them differently!
Stinger: This is
just a free-hand point that I cut for you. It's cut longer
than what extends out his little hiney to give you something to
attach to the back of the bee. (I'd tape it rather than glue
it to make it more solid.)
Head: This is the
shorter, wider black heart. I drew on a mouth with the white
gel pen, but I don't like it, and it was too late to start
over cuz I already had the whole thing glued on! As you can
see in the prototype below, they didn't even do a mouth!
Antennae: This is
actually the taller black heart, cut down to form two
antennae, but I left the
bottom point so that it would be easier to attach to the back of
the head.
Eyes:
I used 1/2-inch punched white circles and 1/4-inch punched black
circles ~ with a white gel pen dot on the black part of each eye ~
however, my 1/2-inch circle punch quit on us early on in the
project, so you have a couple of wiggly eyes in your kit instead!
THE MESSAGE:
Several Bee-based messages are included in
your kit, but if you need another, with even more messages, click
here.
... I cut the outer points of the "Happy Bee-day" banner by hand.
THE "FAUX STITCHED" APRICOT PATTERNED PIECE:
Use the paper piercing tool (and the
template) to punch holes all the way around the edge. You
reeeeeeally have to stay focused on NOT letting the template
slip, or you'll start going off. There are two ways you can do
this, and both work, just differently. (And some gals prefer
one; some the other!)
1) Draw the line of black
"stitching" with a ruler first, before you do the dots, and
then punch the dots onto the line. It's easier to keep the
dots lined up this way. Or...
2) Punch the dots all the
way around first, and then draw your line free-hand.
This is a little harder, but looks a little more real or "natural."
|
Here is the prototype:

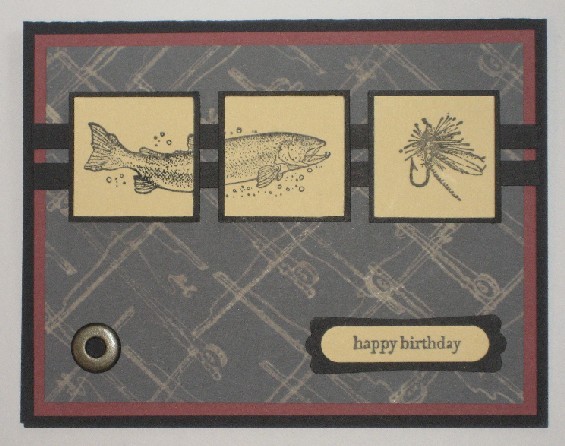
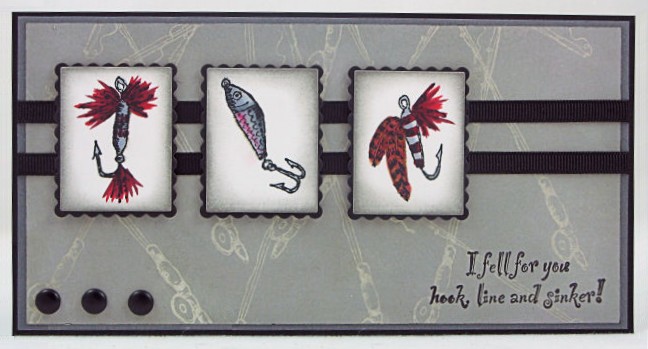
"FISHING" CARD
|
Project
Notes:
THE BLEACHED FISHING POLE
BACKGROUND: Because
most of you might not have a fishing pole stamp OR bleach, we went
ahead and did these for you. Actually Jean Merritt did them
for you!!! She came over to pick up her kits, and I just put
her to work!!!! (That'll teach ya to come after a class and
offer to help!!! ;-D )
GROMMET:
First punch a hole the size of the
center of the grommet using the hole punch on the side of your
Crop-o-dile. Then press it on using the top. (You'll
need to refer to your directions as I can't really tell you how to
do that.) If you don't have a Crop-o-dile, just bring your
card to the next class (or have me bring it somewhere that I'll be
seeing you, or come up at a totally NON-class time!), and I'll help
you get it done! The grommet can be punched through either the
top two pieces (grey and burgundy) or through all three pieces,
including the black card base itself! Because of the thickness
of the grommet, it's more secure to go through all three, but if you
don't like it showing on the inside of your card, then just punch it
through the top two pieces. You might want to use a glue dot
in the lower left corner to make it stay better.
THE SQUARE-PUNCHED FISH AND
FLY:
Again, I had a feeling most of you don't
have a fishing set, so I just stamped and punched the fish and fly
for you.
TWO BLACK BANDS:
They used black grosgrain ribbon in the prototype, but for this
arrangement, I prefer the solidness of cardstock; it's much easier
to get this straight than ribbon.
SENTIMENT:
I don't have this sentiment, which IS
really cute, so I just used something from " In fact, I used
several stamps so you'd have some choices!
|
Here's the prototype
from
which I got the
basic idea:
To get a similar effect with the artwork, you
could stamp in VersaMark and color it with pastels.
Supplies to Bring
to each class:
 Paper cutter Paper cutter
Snail adhesive
(for those
who prefer that over glue sticks)
Reading
(or
close-work)
glasses!
(A little tip... I
normally wear
2.50–2.75
reading glasses, but for
closer, more-detailed work
like this, I got a pair of
3.00's and LOVE them!)
Small sharp scissors

List of supplies to
bring this time,
if you have them,
and want to bring them:
text
text
text
text
I might think of
something
else, so check back
again tonight
or in the morning!
|