So you can find her
notes about her card there! (No video; just a few tips.)
But I'll add a few of my own tips here...
EDGING:
Lynn used the "Rock 'n' Roll" technique, but I found that to be too
awkward considering the larger-than-the-stamps size of the clear
blocks ~ making it pretty much impossible to get the ink onto just
those edges; you
end up going way into the stamp. So, instead, I used markers
on the edges. I laid the marker at a steep angle to the stamp's edge
and used the side of the brush end to color the edge, and in a ways,
kind of feathering it as I pulled the brush in toward the middle.
... Stamp first, then edge with the marker, then huff, then
stamp. Here are some more specifics on both of the edged
items:
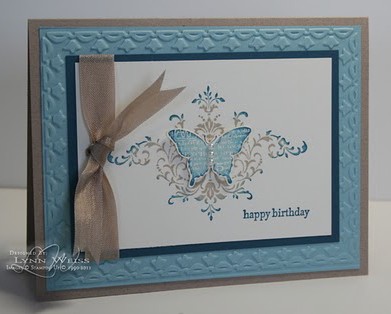
SCROLLY BACKGROUND:
I used Not Quite Navy on the edges of the scrolly background, first
stamping in Crumb Cake.
BUTTERFLY:
I tried Not Quite Navy on the edges of the first butterfly I
tried, but that was too dark, so I used Baja Breeze on the edges of
that, and I had first inked it up on a Soft Sky stamp pad.
RIBBON:
Lynn used Crumb Cake seam binding (which she raved about), but, not
having that, I used white taffeta or silk ribbon, which I think look
just as nice. (I think I gave the gals both of those choices,
and maybe another, at class; I can't remember what ended up in the
kits.)
BUTTERFLY NOTES:
The center of the butterfly is a perfect place to use those
strings of tiny pearls ~ which are in Stampin' Up's Pearls
embellishments! They are actually strung-stuck together by a
narrow strip of adhesive!! So don't cut them apart for this!!
What I did was to cut the paper they're on right between every three
pearls. It's easiest to pick them up with a paper piercer ~
which you want to dig down under the pearl, beneath the
adhesive, being
careful to not pull the pearls off the adhesive! Once you've
pulled it off the paper, it's easy to carefully position
it on the center of the butterfly! ... Cut out the
butterfly leaving ~ as in the picture ~ a tiny rim of white
all around. No
need to cut way into the antennae.... And
then as for
mounting it ~ I used four tiny
pieces of Dimensionals on the wings, two on each
wing. Be sure to not get the Dimensional too close to the edge
as you don't want to see it.
MOUNTING THE MAIN
PIECE: First attach the ribbon (and you tie it "left over
right, right over left" to get it to lie this way), and then add
Dimensionals to the back, then attach!
SENTIMENT:
This is actually an "oopsportunity"!!!
I would much
rather
have
done this as it is in
the prototype
(below), just stamped on. The way I did (had to) do it,
the sentiment piece is a little distracting to the main image.
BUT I messed up on it, so I had to create this piece to cover up the
boo-boo. Were I to intentionally use this piece, I would put
the scrolly image (with the butterfly) a little higher to make room
for the sentiment. (But I actually wouldn't intentionally use
it!)
Here's the
prototype of this card:
As you can see, I stuck
with the same design!
The ribbon color's
different, since I don't have this one. Plus I
made my "tipping" on the
outer scrolly parts a bit "more."
(I like this better.)
SPONGED-EDGES
BUTTERFLY
CARD
Project
Notes
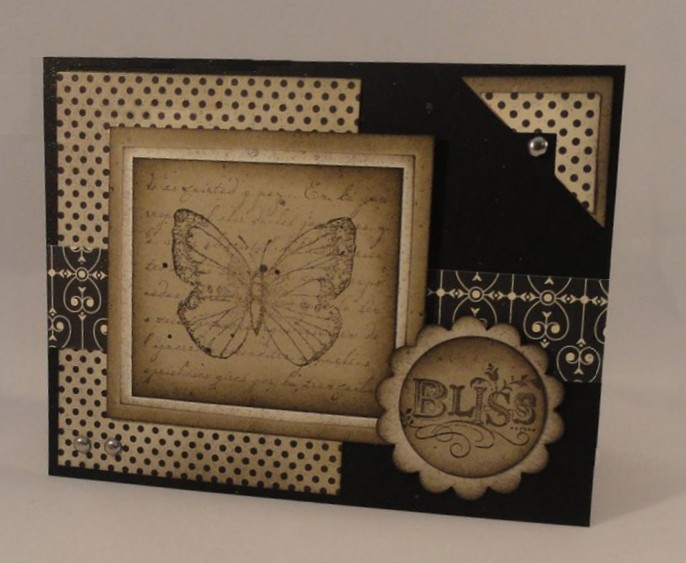
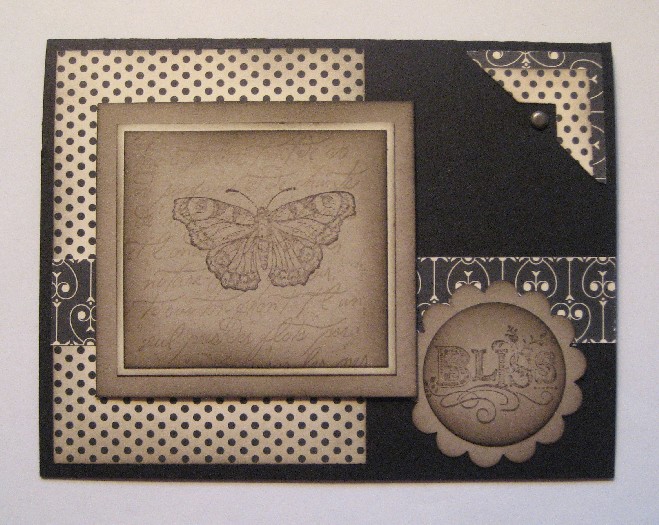
SPONGING:
The edges of pretty much every single piece are
sponged!!! So there's a LOT of sponging to do!!! If your
hands need to be clean-looking for anything within a day, you might
want to wear laytex gloves! You
can sponge as extensively
(as far in to the piece)
as you like, or just lightly at the edges. The card to the
right is sponged more heavily than the card below. Both are
just as pretty!
●
Pieces with more color were sponged in a darker brown: Basic
Brown, Soft Suede, Chocolate Chip, or Early Espresso. Just
esperiment
(get it? ~ misspelling
intended) on the
back of each piece to see what you like.
●
Then on the lighter colored pieces, I used Crumb Cake.
(or Kraft ~ which was the
old name for Crumb Cake)
Yes, even the
dotted (or
Houndstooth ~ or whatever you might have in your kit)
piece is sponged!
BRADS: Ithink we only used one brad, in the niche of the Photo corner in
the upper right corner. (If you have three, then refer to the
picture of the prototype below.)
BAND ACROSS THE MIDDLE:
You have a small piece of black and cream DP that's not as wide
as the area you want to cover... You want to cut it at about 1
inch from the left side (there's not really an "up" or "down" to
it), and place that behind the left side of the butterfly piece.
Then you'll have plenty left to go on the right side! ...
It works best to use a ruler
to get the pieces even with each other along the bottom.
MOUNTING THE TWO MAIN PIECES:
The butterfly
piece is popped up with 3 Dimensionals. The sentiment (scalloped
circle) is just glued on flat. (It's opposite this in the
prototype.)
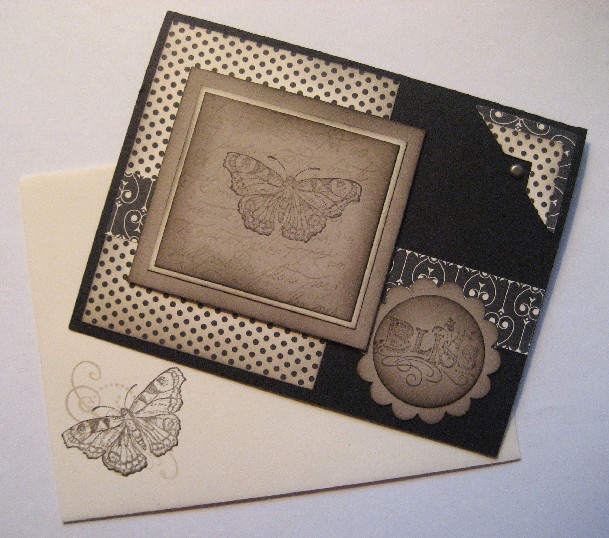
ENVELOPE:
Here's the card with the envelope I made to go with it. I used
the swirl from "Priceless" stamped off lighter, (or in a lighter
ink, like Crumb Cake) with the butterfly stamped in the darker brown
on top of it and to an angle ~ kind of flowing in the little
"breeze" of the Priceless swirlies.
VARIATIONS
Dotted
Designer Paper - I ran a little short on this DP ~ for the
larger piece behind the butterfly, so Wanda mounted it onto a piece
of Crumb Cake, and scalloped
the left edge. It makes it a little more feminine ~ which you
may or may not want ~ but it's just as pretty, *I* think!
Upper Right "Photo
Corners" - This card has the same corner as the card above,
but Wanda mounted the double corner onto a piece of Crumb Cake.
(So that's what that little scrap of Crumb Cake in your kits is for!
~ in case you'd like to do that!)
Sentiment in
Scallop Circle: Wanda wanted a different sentiment, so
she combined "love YOU" from one set, the smaller swirl from
"Priceless," and the tiny flower from "Itty Bitty Bits."
Border Around
Butterfly - You might notice that the light border around
the Crumb Cake Butterfly piece is wider than it is tall.
That's because Wanda didn't get the butterfly stamped as
in-the-center as she wanted, so she sliced off one side. She
actually could have sliced the top/bottom off to get it even all the
way around, but liked this effect!
More Masculine
- You could make this card even more masculine by:
●
not using the scallops in the card above (just do it like the
original)
●
using a plain circle without the scalloped circle for the sentiment
●
using a more "guy-ish" stamp in place of the butterfly ~ like a
clock, fish, leaf, knife, deer or elk, wild animal, etc.
Any way you do it, this
is a
very stunning card!
I love it!!!!!
Here's the
prototype of this card:
I stayed pretty much
with this design, though I didn't
have this butterfly
stamp, which is bigger, and which I (therefore) like
better. But, you know,
you can't have every stamp that exists!!!
(And I
do think I have a pretty good start!)
Also, I did not
add the two brads in the lower left corner.
I just didn't think they
were needed.
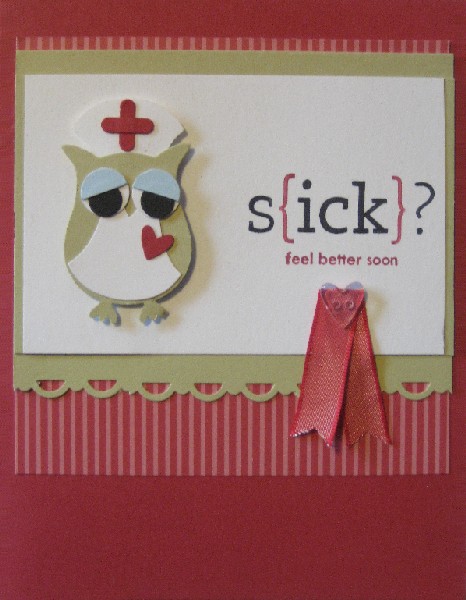
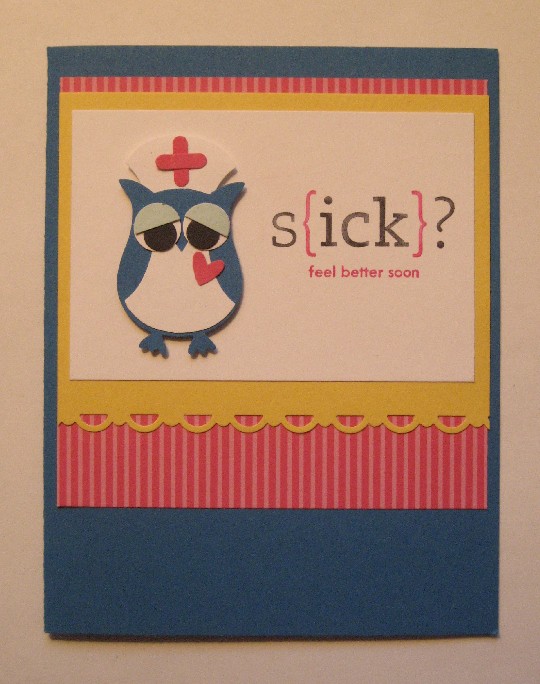
NURSE
OWL CARD
Project
Notes
1) Assemble the
little punched owl ~ all of which goes together as shown here.
(Two additional tips on the owl in numbers 2 and 3.)
2) Cut the light
blue circle in half to form the eyelids.
3) The red cross
on the nurse's hat is probably the trickiest part. It's
helpful to use tweezers. And go slow, with a lot of
patience.
4) Overall, glue
sticks are probably the easiest to use as they lend the
greatest flexibility, however, they are messier, so you might
prefer the neatness of the snail adhesive. You just have
to make sure you're placing it exactly where you want it.
Again, tweezers are helpful for this.
5) With the brush
end of two different markers, color in the word:
"s{ick}?"
and "feel
better soon"
below it as shown.
6) Layer and
adhere all pieces as shown.
7) Adhere the
little ribbon and button with a glue dot.
Here's the
prototype of this card:
I made it at a
Stampin' Up meeting, but another
demonstrator
either designed or copied it. I would have
done this color
scheme, but I don't have these buttons... The
only ones I have
that were small enough to work are the
Sale-a-bration
buttons, so I had to totally re-do the
color scheme to go
with the buttons!
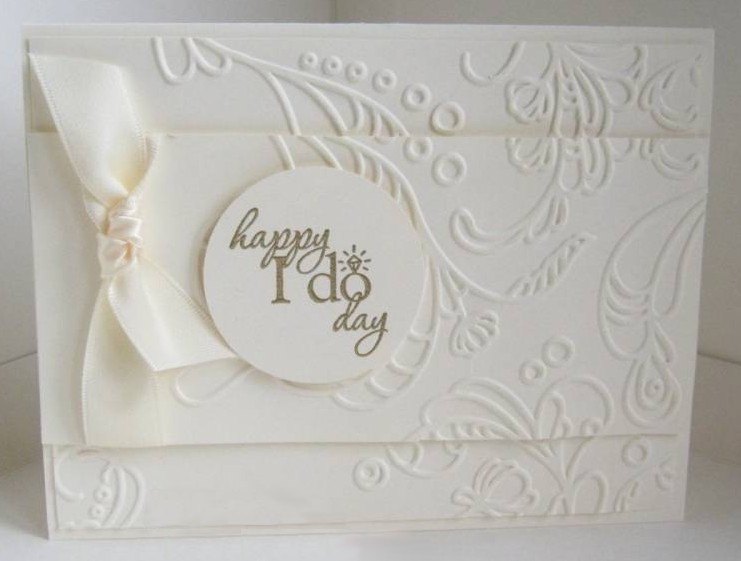
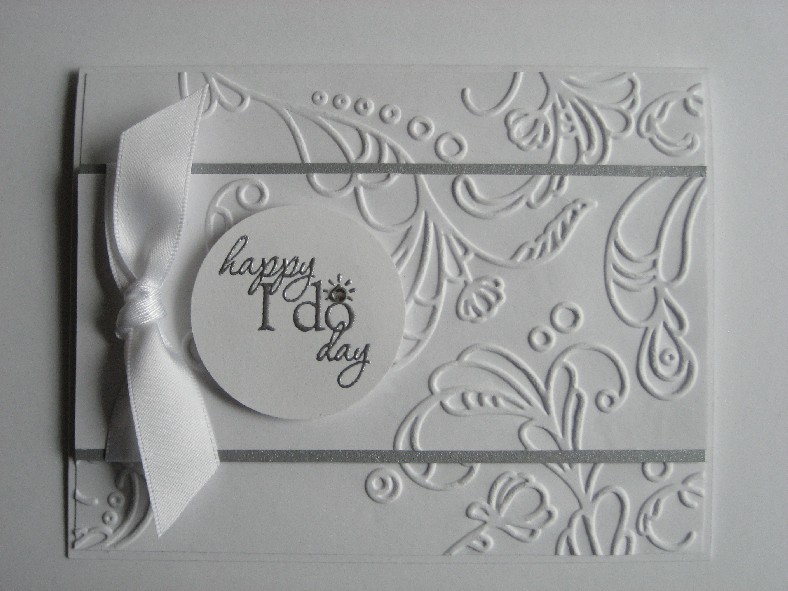
TRI-SECTION
EMBOSSED
CARD
Project
Notes
This card is SO fun
and simple, and the format very versatile! (Other samples
below.) The basic idea is this:
1) Cut a main
card piece in the usual size (1/2 sheet of cardstock) and score
and fold it in half. (This can be white, as above; or any
other color, such as the pink baby card below.)
2) Next cut a
white piece
4-1/4"
by
5-5/16"
(3/16" less
than 5-1/2").
3) Emboss this
piece ~ whole ~ in the embossing folder of your choice.
The folder above and the prototype
below
are in "Elegant Lines"; the baby one uses Finial Press. The
dotted one ~ or ANY of them ~ are just as cute!!
4) Cut a layer
piece for the middle part 5-1/2" by 2-1/2."
5) Now cut 1
inch off the top, and then 1 inch off the bottom of the embossed
piece ~ so that it looks like the pieces in the picture.
(Keeping the pieces in the right places is not important when
using a small, evenly-distributed pattern like Perfect Polka Dots,
Final Press, etc. However it IS important when using Elegant
Lines as you want to keep this pattern intact.
6) Put the
colored (silver or pink) mat behind the largest piece.
7) Wrap the
ribbon around left side of this, and tie it "left over right,
right over left" to get it to lie as it is in the picture.
8) Put a
Dimensional in each of the four corners (at least 1/4" away from
the edge), and one or two in the middle.
9) Glue the two
narrow pieces to the top and bottom of the card base, allowing
uniform margins left to right, and top and bottom. (No need
to worry about the middle, or how it looks, as it will be
covered by the middle piece. Glue directly to the card ~ no
Dimensionals.
10) Remove
Dimensional papers and mount that piece to the card, carefully and
evenly covering the top and bottom pieces.
11) Stamp "happy
I do day" on a piece of white cardstock in Versamark, emboss in
silver, and heat set. Punch it out using the 1-3/4" circle
punch.
12) Mount
onto the card with three Dimensionals.
13) Using a
paper piercing tool, lift off a rhinestone (going under the
adhesive; you don't want to lift it off the adhesive), and
carefully place onto the diamond on the ring.
And WAH-LAH ~ you
are DONE!!!
Isn't it
pretty?!?!?!?
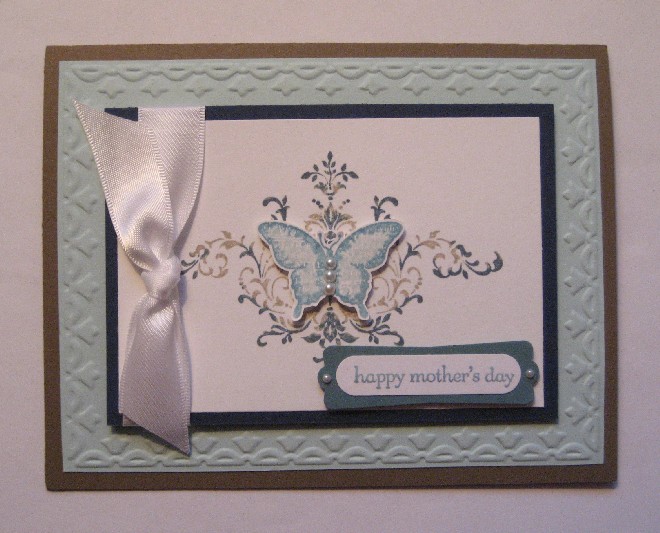
Here is the original
prototype of this card:
As you can see above,
they original artist
didn't have the silver
layer behind the middle piece; I
just thought would be a
nice addition. It's beautiful
without
it,
too though! ...
(BTW, this picture is
more what my card looks
like, color-wise.)
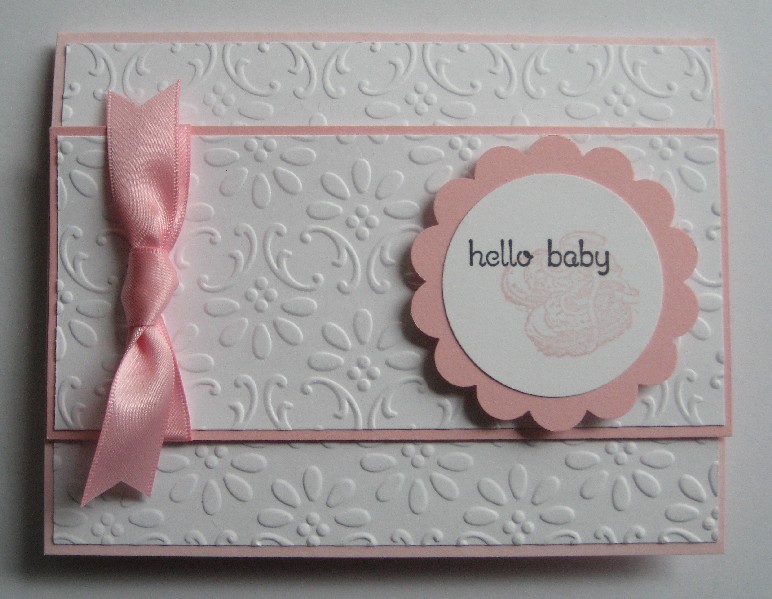
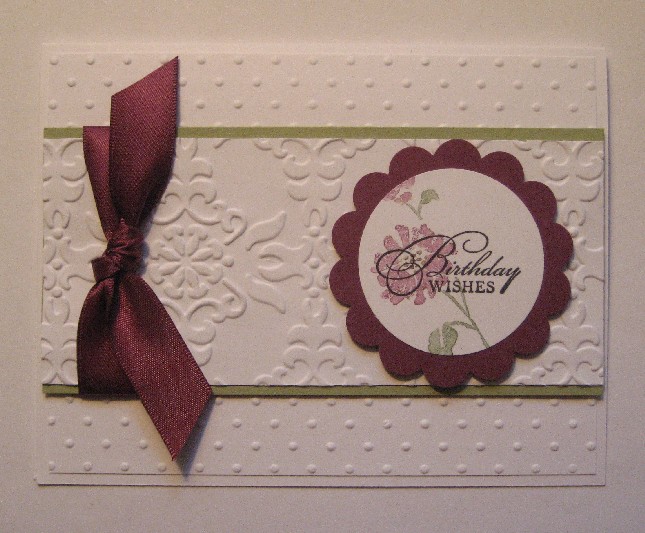
And here is the exact
same layout,
but done in baby girl
colors, and with a different
embossing folder!
(Finial Press)
Isn't it CUTE!?!?!?!?
SOOO simple, but SOOO pretty!!!
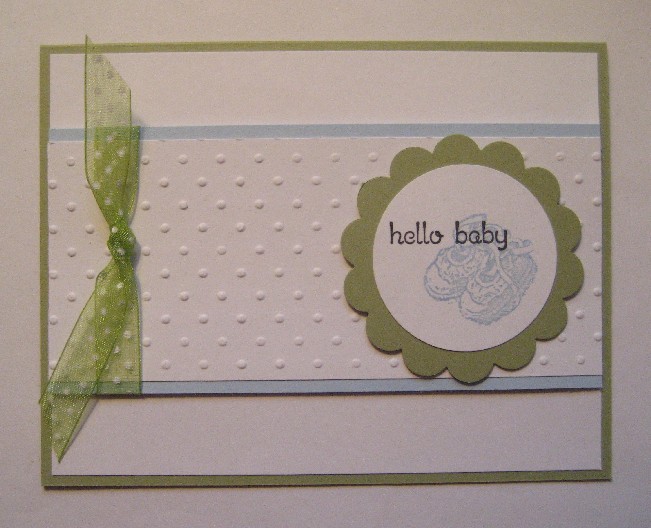
And here's a baby BOY
card in the same layout:
Note that I made this
one a bit simpler
by embossing just the
center piece.
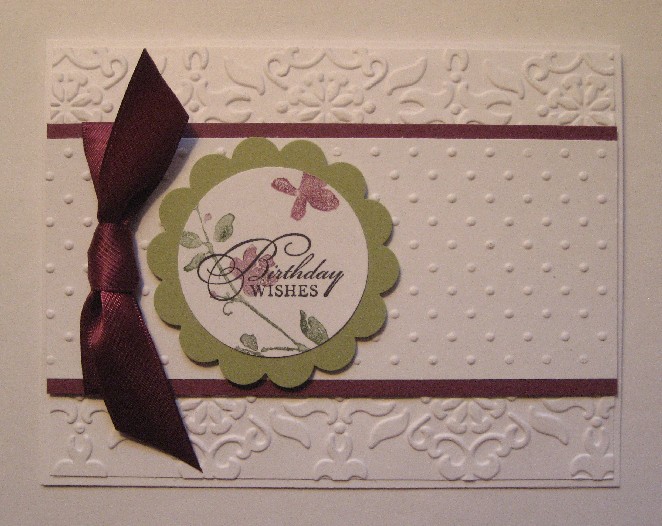
And here are another two
cards, same layout but
can you see what I did
with these? ~ besides doing the matting
and scallop circles in
different colors, and putting
the circles on different
sides?...
Hint: Look
carefully at the embossed backgrounds...
I embossed two
different backgrounds ~ Vintage
Wallpaper and
Perfect Polka Dots ~ and then switched the
center pieces with
each other!!! ... Cool, huh?!?!?
 IECES:
The butterfly
piece is popped up with 3 Dimensionals. The sentiment (scalloped
circle) is just glued on flat. (It's opposite this in the
prototype.)
IECES:
The butterfly
piece is popped up with 3 Dimensionals. The sentiment (scalloped
circle) is just glued on flat. (It's opposite this in the
prototype.)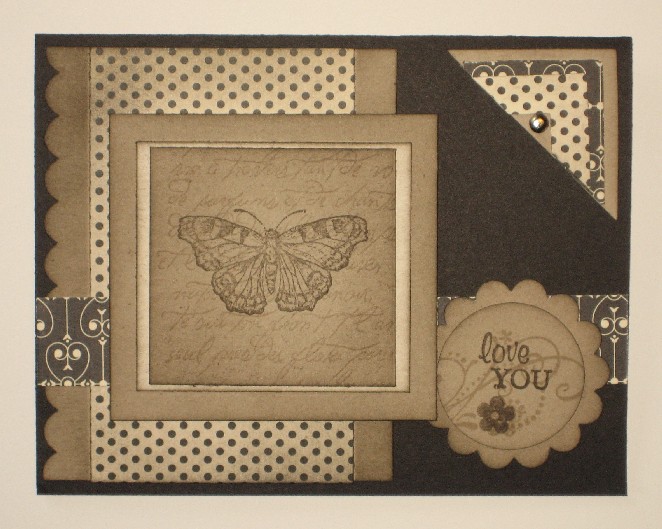 loped
the left edge. It makes it a little more feminine ~ which you
may or may not want ~ but it's just as pretty, *I* think!
loped
the left edge. It makes it a little more feminine ~ which you
may or may not want ~ but it's just as pretty, *I* think!