|
PROJECTS
for Stampers Season Class
ON
January 9, 2010

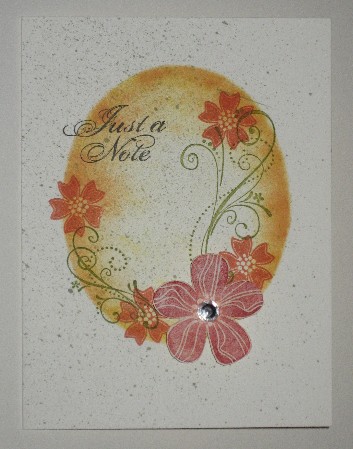
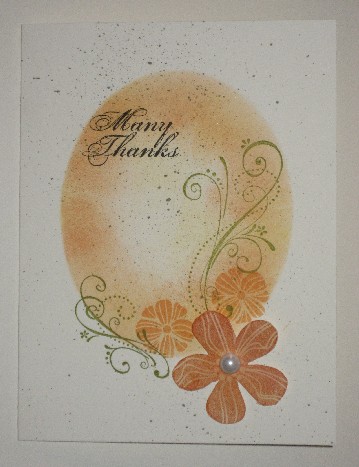
"Sponged
Oval
with
Floral Spray"
Card
Here are five cards
made by the ladies at
class!!!
Kathi, Marilyn, Jean, Tracie, Lisa, and
Sherrie are the ones who could have made these, but
there are only five cards here, so I'm not sure whose are
missing!
Wanna let me know who made which ones, ladies?!?!? It would
be fun
to give credit where credit's due! I do know who made one
of
them because I helped her with the bow; and I did make
a guess on two of them!!! Let me
know if I'm correct!!!)
|
 |
 |
|
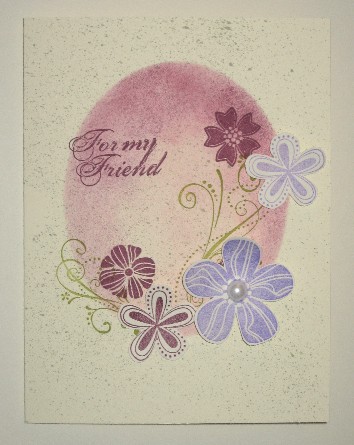
Made by ??? |
Made by Marilyn |
|
|
|
|
 |
|
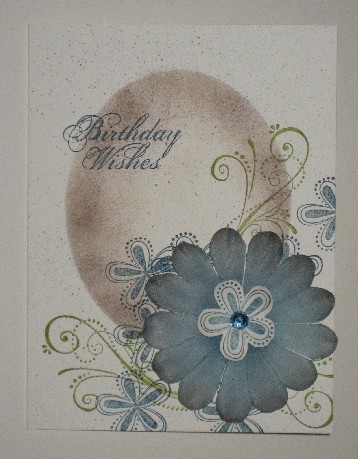
Made by Sherrie
|
|
 |
 |
|
Made by Jean |
Made by ??? |
Here is the prototype for this card
that I saw on Splitcoast Stampers:
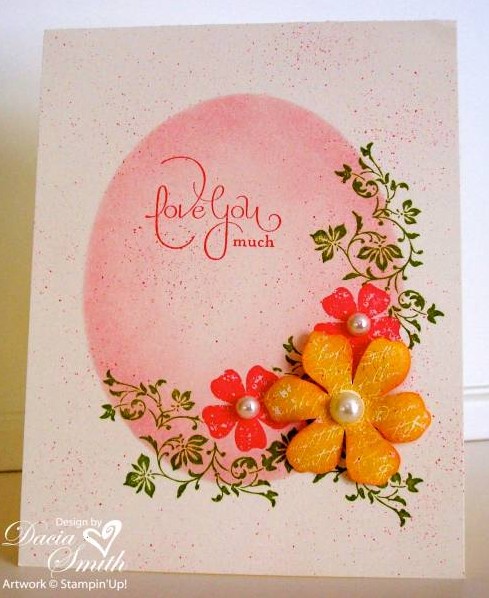
Here's this card at Splitcoast Stampers:
http://www.splitcoaststampers.com/gallery/photo/1578890
Here's the same card, but at the artist's own
website, so it has a few more notes and directions:
http://creativedaze.wordpress.com/2010/01/02/love-you-much/
Note:
I do not have any of these stamp
sets, so that's
why our cards look so different from
the prototype.
The text stamp
is from the new Sale-a-bration set
called "Whimsical Words," and
the
flowers and leafy stamps are from
"Vintage Vogue" in the
new Occasions Mini catalog, page.
|
Kit
Notes
  
OVAL: I have made each of you (who weren't able to be at class and who
are getting the kits) an oval template, which you simply
lay over your card front, and sponge whatever
color you want ~ Summer Sun, Cameo Coral,
Only Orange, or Pumpkin Pie ~ inside the oval space.
Note that the sponging is a little darker
around the outside edges, and lighter in the
middle. Also note that it is not sponged
evenly, but still (amazingly!) looks
great, so no need to try to make it perfectly even!
FLOWERS:
I have stamped a few for you to cut out
and adhere with either glue or, if you want it to pop, use
dimensionals ~ on maybe even just one flower, so it overlaps a
smaller one. Most of these flowers were stamped, but again, I
couldn't stamp them without doing the whole card for you, cuz the
oval would have had to be sponged first. ( I stamped more
flowers than you probably need for the card, so you may want to save
a flower or two for the envelope!)
FLOWER CENTERS:
I included something for you to
use in the center of your largest flower. I can't remember if
it was a gem or a pearl, but do look for it in there!
LEAFY SWIRLIES:
I couldn't stamp these for you
since the ovals weren't yet "made," so I'm hoping that each of you
have something you can use that's either swirly or leafy. If
you have "Priceless" that's what we used. Or if you got the
Sale-a-bration set called "Yummy" from last year, that would work,
too. If you don't have anything that would work, feel free to
borrow something from me, or bring it to the next class and just
stamp that part here! (You need to have sponged the oval
first!) (I DO now have "Vintage Vogue"! Just got it this last
time!)
SENTIMENTS:
Note that the words look pretty whether
they're all the way enclosed in the oval, or part-way out. I
normally prefer black ink for my sentiments, but I think doing them
in colors that match the card looks just as nice for this card!
|
|
TECHNIQUES
we'll learn & do:
Speckling
Oval Template
Sponging
|
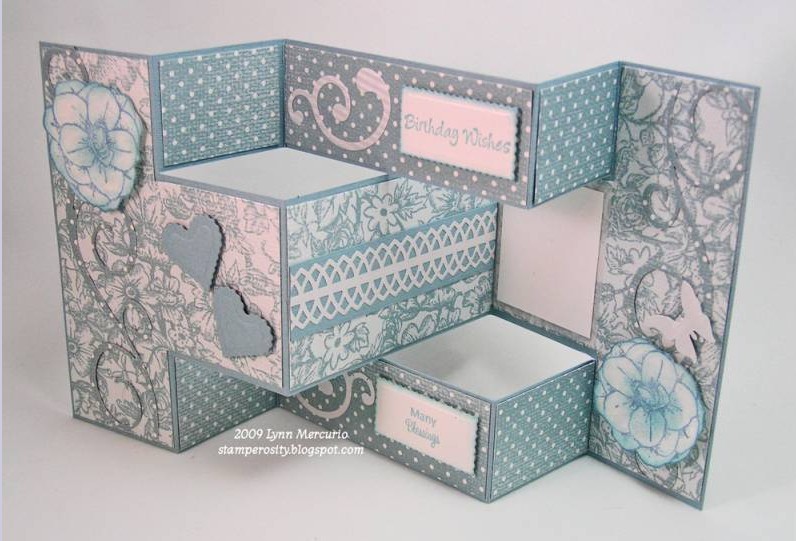
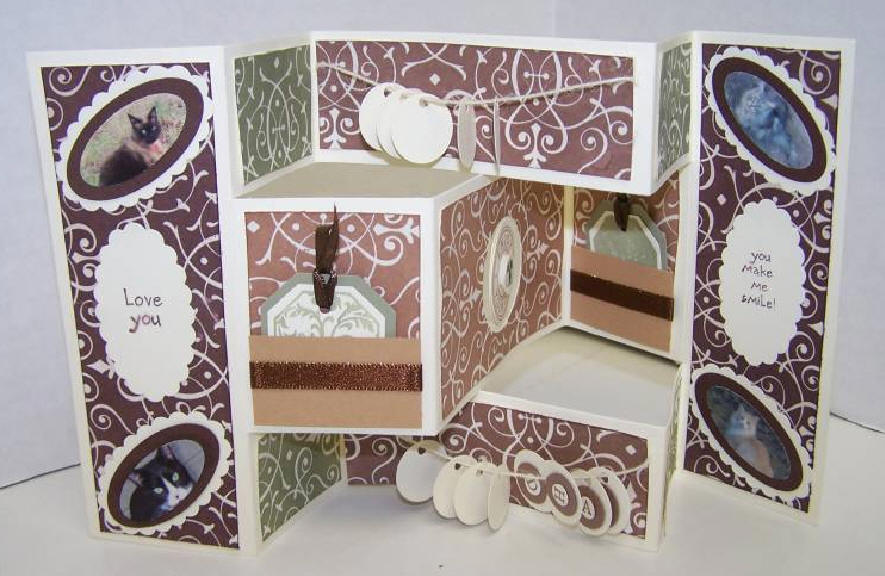
Tri-Shutter Card
You will make your own rendition of
this TYPE of card; not any of the actual cards
below.
In fact, I would LOVE to have pictures
of any cards YOU finish!!!
The above card (with more details) is
here:
http://www.splitcoaststampers.com/gallery/photo/1350447?cat=500&ppuser=59966
The original tutorial on how to make this type of
card is here:
http://www.splitcoaststampers.com/resources/tutorials/trishuttercard/
At the end of it is a link to a video
tutorial
on this by Beate Johns, the head of
Splitcoast Stampers.
She really makes it clear and easy!!!
I have corrected some of the
measurements and
re-done the directions for the two front
and back "T-shaped" pieces.
Plus I reformatted the above tutorial
for you so that it prints out
on fewer pages than the above one does:
www.homeschooloasis.com/INSTRUCTIONS-Tri-ShutterCard-BSS
Here are four more ideas for how to
embellish them:
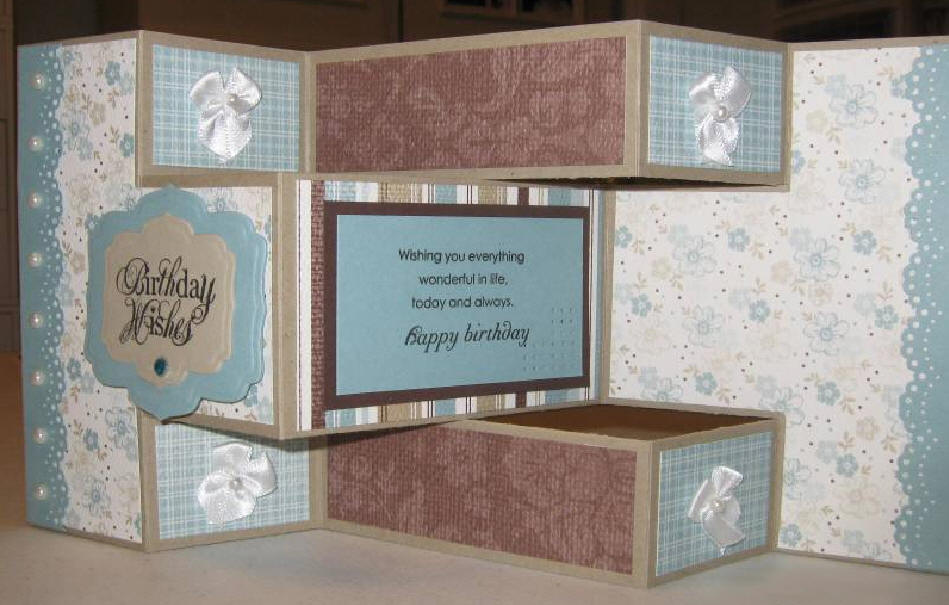


Notice that the ways of combining designer
papers are different on each card!!!
Some have only two papers, others have
several! There's no "one right way" to do it!!!
And in this last sample, notice that
there are pictures of cats in the ovals in each of
the four corners(!), and there are
little tags with brown ribbon pulls in two little pockets:
|
Kit
Notes
CIRCLES & SCALLOPS: I
cut several of each for you, in different colors.
DESIGNER PAPERS: I
have included what I hope will be more than enough papers for
you to cut down to the sizes in the instructions.
|
|
TECHNIQUES
we'll learn & do:
Tri-shutter card technique
(And whatever else you
try as you embellish!)
|
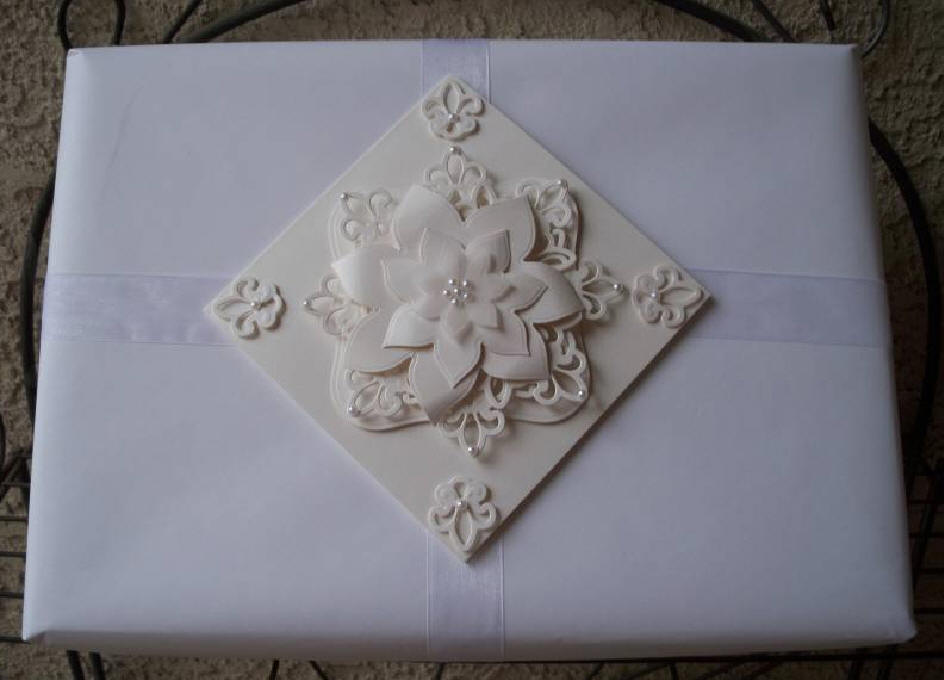
Punched-Flowers
Wedding
Card:
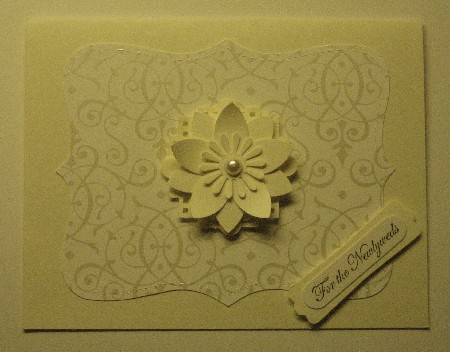
This picture is a little dark due to the
lighting;
the card is actually cream!
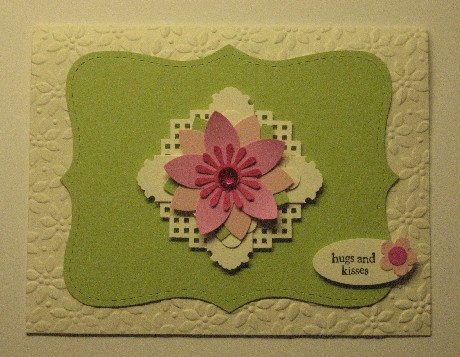
We did not make this card at class; I
made it (in my own
wedding colors) to show you that it's
also very pretty in COLOR!
The technique is exactly the same!!!
Here is the picture ~ a gift with
embellishment ~ I saw
online that inspired the idea for the card we'll be making ~
which is
only "vaguely reminiscent" of this
one!  (There is
just (There is
just
NOOO WAY I would go to all this trouble
to just
make a decoration for a gift!)
|
Kit
Notes
CARD:
I gave you the
pieces to make the cream Wedding card; I made the other card
to show you that this same idea can be used with colors, too.
(I'm going to need someone to
tell me what else I need to explain because I put these kits
together AT class, and then gave them out to everyone with
their orders, so now I don't have any here to look at ~ and
I'm not remembering what I gave you in this kit. So if
anyone could let me know, that would be great!)
|
|
TECHNIQUES
we'll learn & do:
Inverted Square
made with Square-Steps Punch
Punched Flowers
|
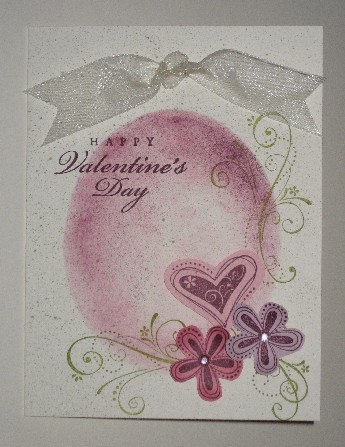
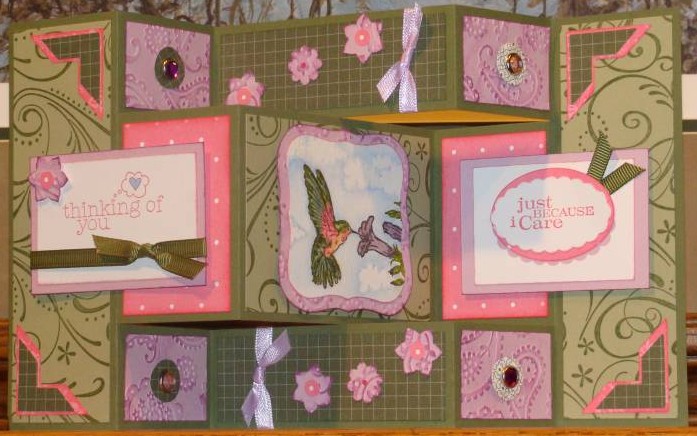
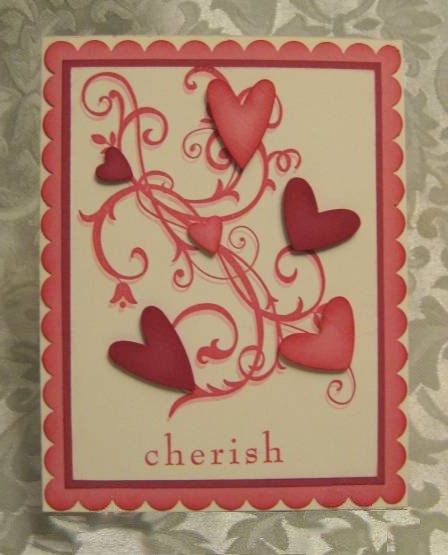
Baroque
Motifs
Valentine
Card
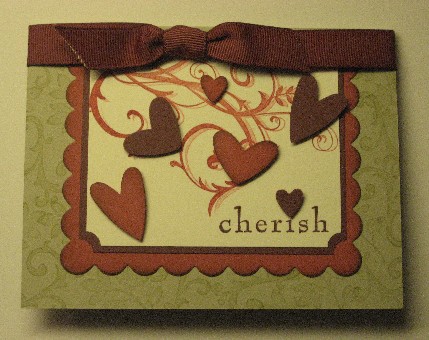
This is just a general prototype of the card we'll be
making.
The background of this card is actually the
tablecloth behind it, which
I edited so it would look like part of the card.
:-) I don't have a rectangular
scallop die, so you could use the
scallop border punch, but the challenge
WILL be at the corners. So
experiment a bit with that
before doing your actual card piece.
|
Kit
Notes
SCROLLY OUTER BORDER:
You can use ANY scrolly stamp
around the edges. Stamp it in Mellow Moss for a more subtle
look; Old Olive for a stronger look; or in Always Artichoke for a
downright bold look. I used the scroll and leafy-flower in
Carte Postale, but any scrolly stamp will work!
SPONGING:
Sponge the edges of the scallops in
Bravo Burgundy, and the lighter (Ruby Red) hearts in the same color
(if you want more contrast) or Ruby Red (for less contrast)
STAMPED SCROLLY DESIGN:
This is from Baroque Motifs.
I stamped one piece for you in case you don't have that set or
anything like it, and I also gave you a blank one so that you can do
your own, if you want! I stamped it in Ruby Red, and then
moved it EVER so slightly down toward the lower right corner so that
it created a lighter shadow. Hint: Press pretty firmly
the first time, and then lightly but evenly the second time.
This is a pretty strong color, so the second impression can easily
be almost as strong as the first if you don't do it this way.
(Just be sure you press all the way out to the little scrolly that's
just under and to the right of the large tall Bravo Burgundy heart
over on the right side.)
PUNCHED HEARTS:
I punched three hearts in Ruby
Red using the "Heart to Heart" punch (so it was actually just one
punch), and three in Bravo Burgundy. After sponging them, put
two half-dimensionals on the back of each of the four larger hearts
to pop them up, and just glue on the tiny hearts. Or pop them
up too, if you want; I did, but then realized it was a bit tricky
for not that much of an effect since they're so small.
THE TIE:
Make a typical tie going "left
over right, and then right over left." If you want it to look
like this one, see Dawn's demonstration
here. How to do the bow above starts about one minute into
it, and takes one minute.
MATTING OF MAIN PIECE:
You can see where to position the
stamped cream piece over the burgundy piece; just be sure to Ticket
Corner Punch the two lower corners before mounting it onto the Ruby
Red Scalloped piece. The top edges of all three pieces line
up. However...
TOP:
I cut (with scissors) the top of
the main piece downward from each side toward the center of the tie
~ which is lower. I didn't want the card piece showing. |
|
TECHNIQUES
we'll learn & do:
Stamped-off Shadowing
Dyeing Silk Flowers
|
Supplies to Bring
to this class:
...IF you have them. I
have extra bone
folders, and two extra
paper cutters, but if you bring
your own, you won't have
to wait.
 Paper cutter Paper cutter
(a fresh new cutting
blade will be a boon!)
Bone Folder
Snail adhesive
(if you prefer that over glue sticks;
it will come in very handy today!)
These punches:
straight scallop,
5-petal flower, 3 hearts
Gem brads or
stick-on gems
(Again, I have
PLENTY!)
Pearls
(not real, of course! And
I have PLENTY!)
Small sharp scissors
Your reading (or
close-work)
glasses!!!

(A little tip... I
normally wear
2.50–2.75
reading glasses, but for
closer, more-detailed work like
this, I got a pair of
3.00's and LOVE them!!!)
I might think of
something
else, so remember to check back
again
later tonight or in the morning!
|