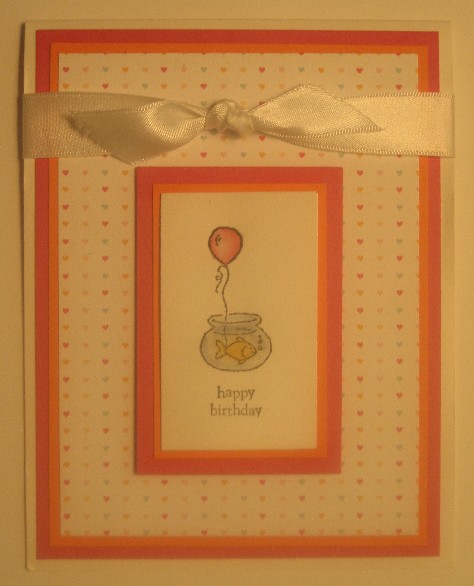
I just
switched the little picture in the very middle.
(That's why the bows look exactly
the
same; they ARE the same!
)
The
lighting is just a little off on this one,
but at
least you get the idea:
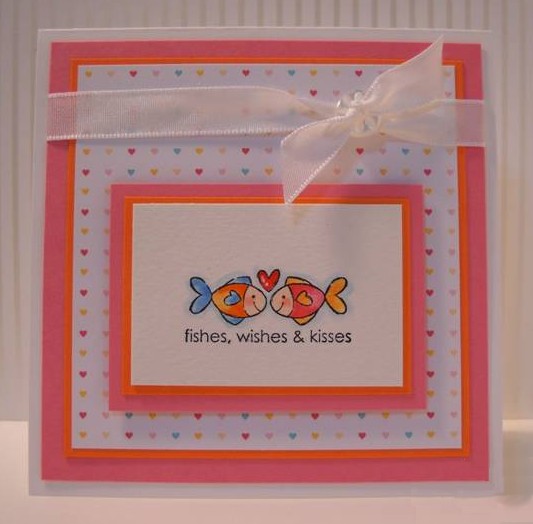
Here is
the prototype I got the idea from,
which is actually
closer to the actual colors.
(I
must have taken my pictures at night.)
Project
Notes
CARDSTOCK: White
CS cut "hot dog style"; score at 5.5" and cut at 4.25"
(I'm not sure what the colors were that
I actually used, and I have given the card away, so I can't look,
but you could use any tropical-ish colors
SUPPLIES:
■ Crystal Effects
■ Aqua Painter
■ Dimensionals
■ White Ribbon - 14" for a tie
(I'm guessing you'd want 20" or so for a
full bow)
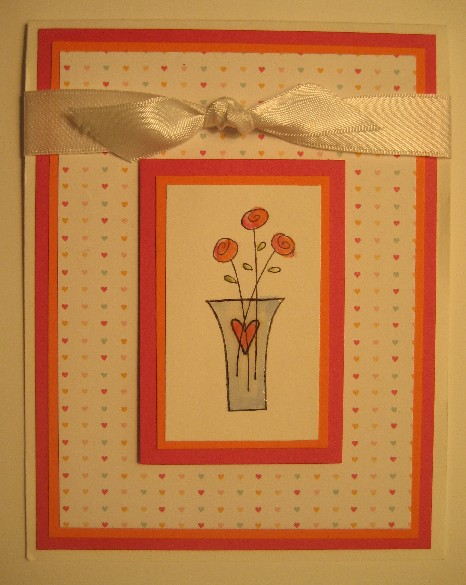
DIRECTIONS:
1) Cut all the cardstock.
2) Stamp your image (vase,
fish, whatever you're using) onto a small piece of cardstock.
Trim to whatever size you'd like it to be. Then place this
onto your first mat color, leaving 1/8" showing on the left side and
top edges, trimming the right, and then the bottom edges.
Then do the same for your next matt piece out. (I do not
measure these; I just start with whatever size looks good for the
image I chose, and then layer my wayout.) As you can
see in this picture with the vase, I have a narrower inside matt
piece (the orange) than I do the pink. This was planned.
3) I then worked my way IN
from the outer edges of the card for the main, larger card matting.
I'm guessing that the dark pink matt is 4" X 5-1/4". Then the
orange piece is 3-3/4" X 5". Then the designer paper (white
with tiny hearts) is 3/16" less on each
side.
(Notice the variance between the orange and pink pieces.)
4)
I mounted the inside (vase or fish) piece with Dimensionals.
5) After it was all put
together, I applied the Crystal Effects to the vase or the fishbowl
and the balloon, and then allowed it to dry in place.
6)
And then last but not least, I tied on my ribbon ~ which went all
the way around the card.
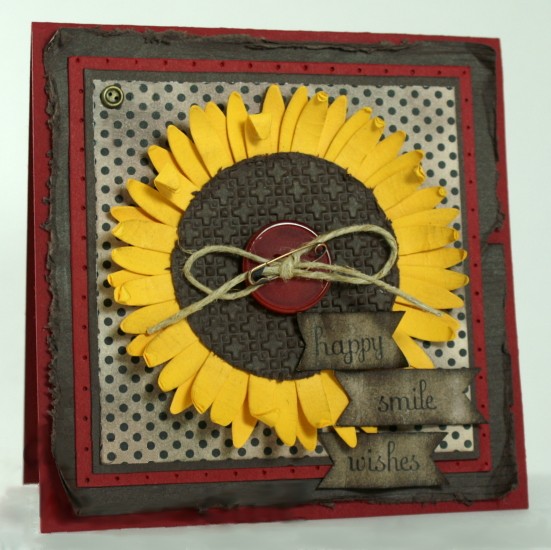
SHABBY
CHIC
SUNFLOWER
CARD
Click
here
to see this card at Splitcoast Stampers.
Ours looks pretty much
exactly like this one, other
than we
only did ONE banner of a word!
(instead
of "happy" + "smile" + "wishes")
Project
Notes
CARDSTOCKS/PAPERS:
■ Top "Top Note" piece is
white CS, cut just on the inside of the dotted lines so that the
dotted lines on the lavender piece matting it show.
■ Lavendar "Top Note" piece
~ in Lavender Lace, or you could use Opulent Orchid, if you still
have that. It'll be a little brighter and bolder.
■ Card Base: Elegant
Eggplant
STAMP SETS:
Butterfly: "All a Flutter"
Silver scrollies on the white piece: "Elements of Style"
SUPPLIES:
White organza (taffeta is used in the
picture) ribbon, brad for the center of the flower, Pretty in Pink
and So Saffron stamp pads.
TOOLS:
large
(not "wide")
oval punch and scalloped oval punch for the sentiment; scallop
circle punch for the pink carnation; paper piercing tool and pad for
making holes in the flower pieces; 5-petal flower punch for the
leaves; sponges to apply ink to the top "Bride DP" piece,
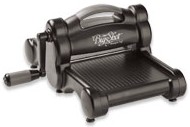
square scallop die and Big Shot.
INSTRUCTIONS:
1)
TOP PIECE: Sponge yellow and
pink ink onto this piece as shown above. Use a cotton ball to
remove excess ink from the scrollies ~ to make them whiter/shinier.
Adhere this piece to the pink square.
2) RIBBON:
Tie the ribbon as directed in the tutorial on
this web page. There are actually two ways to do this
(both are on that same page). The first is the one I used
here, but either works!
3) NEXT LAYER:
Adhere the above (now one) piece to the So Saffron scalloped square
card base.
4) LEAVES:
Punch one 5-petal flower out of green. (I'm not sure what they
used in the sample above, maybe Green Galore, but Certainly Celery
is nice.) Cut into two pieces, one having three leaves, and
the other having 2 leaves. If desired, use a bone folder to
create a vein going up the middle of the leaf, out
to the point, and then veins extending from that center line out to
the edge of the leaf. (See
the leaves in the PUNCHED
FLOWERS ON TOP NOTE CARD at the bottom of this page.)
5) CARNATION:
■ Punch 3 scallop circles out of
the Pink Pirouette.
■ Crumple each circle, opening and
then crumpling again in different directions a few times.
■ On two of these, do a little
extra crumpling. Then, when you see the edges of the
scallops separating, go ahead and continue separating into two
thinner flowers. It's easiest ~ with the least amount of
tearing the flower ~ to start at the outer edge of each scallop,
separating from that down into the flower a little ways, then going
to the next scallop and separating in a little ways from there ~
doing the same all the way around, until the whole flower is
separated.
■ Using the paper piercing tool
AND the pad, pierce holes in the center of all three scallop
circles.
■ To assemble, place the whole
scallop circle down first, then layer the other two split-in-half
scallop circles, smooth side up, onto each other. Push a brad
through all five layers, and open in back.
■ Attach the leaves to the back of
the flower, making sure you don't have adhesive showing on the front
where the leaves are peaking out from behind the carnation.
6) SENTIMENT:
Stamp the sentiment you want to use onto white cardstock. With
the large oval punch up-side-down, hover over your sentiment and
punch. Punch the light pink scalloped oval, and adhere the
smaller oval to the larger.
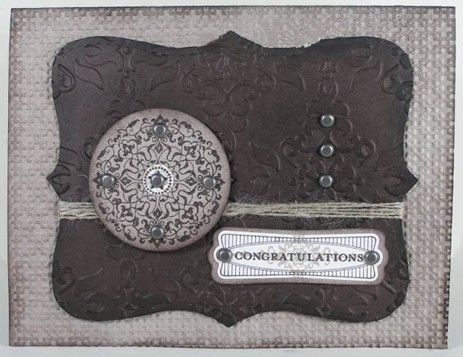
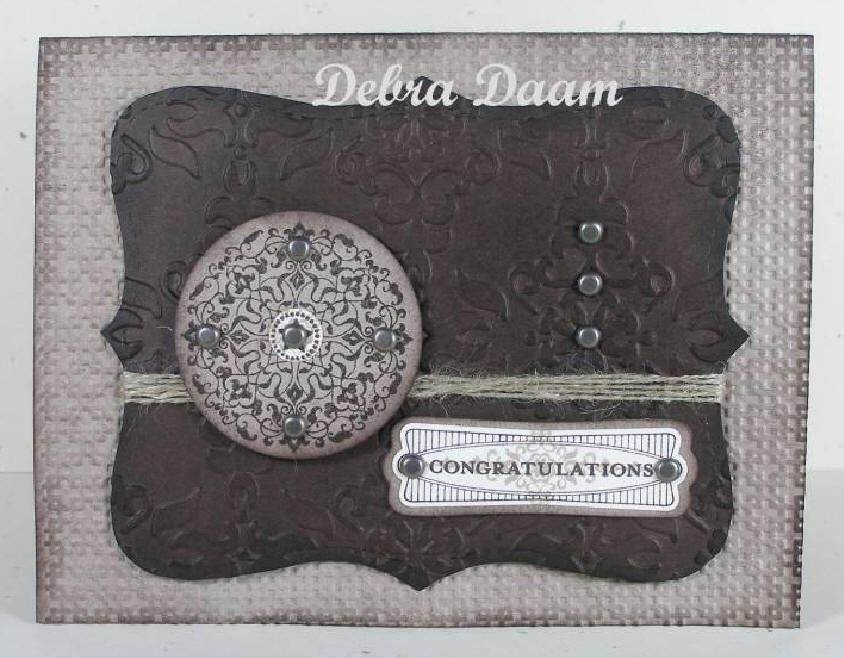
BURNISHED TOP NOTE
MASCULINE CARD
This is
such a quick and easy
"masculine card" to do!
I take
out the signature only so you can actually
see the
card, however, I want the artist, Debra Daam,
to
receive credit, so here's the original photo:
Project
Notes
STAMP SETS:
■ "Perfect Punches" - (the
"Congratulations" stamp" is from there, but any stamp from
"Teeny
Tiny Wishes" would work, too! ~
the sentiment punched with the Word Window Punch, and then the "mat"
for it punched with "Modern Label
Punch."
■ This medallion is from "Artistic
Edgings", but I don't have that set. Really, any
circular, "medallionish" stamp combined with various sizes of circle
punches will work. If it's not big enough, then layer a larger
circle behind it.
CARDSTOCK:
■ Sahara Sand- Cut at 4 1/4" X
11" scored at 51/2"
■ Early Espresso - first die cut with "Top Note", then
run through the "Vintage Wallpaper" embossing folder
■ Any white or cream CS for the
sentiment.
INSTRUCTIONS/TUTORIAL:
Run the front side of the main
card (Sahara Sand) through the Big Shot using "Square Lattice"
embossing folder.
Stamp and punch your medallion
piece(s).
Unevenly sponge edges ~ as shown
in the picture ~ of main card, Top Noted brown piece, and the
medallion. Sponge also across the tops ~ again, unevenly.
(I used Early Espresso on the main card piece; and then that and/or
black on the Top Note piece.)
Wrap Linen Thread around the Top
Note piece as shown ~ 3, 4, or 5 times. (Looks like 5 in the
picture, but 3 or 4 would do. To save thread, cut 5 (or 3 or
4) lengths of thread 1 inch wider than the wide end of the Top Note
piece (that this will be going on), tape securely at one end, tape
onto the back allowing 1/2 inch overlap (fold) to the back, then
wrap around and across the front, folding around to the back on the
other side, and tape in place. (If using 5 strands, you will
save about 20 inches of thread this way!)
Stamp and punch your sentiment.
Adhere medallion and sentiment to card,
using Dimensionals.
Apply brads where you want them.
(They used way more than I felt was needed. Let's see...
I counted TEN! So just do how ever many you think is "enough"!
)
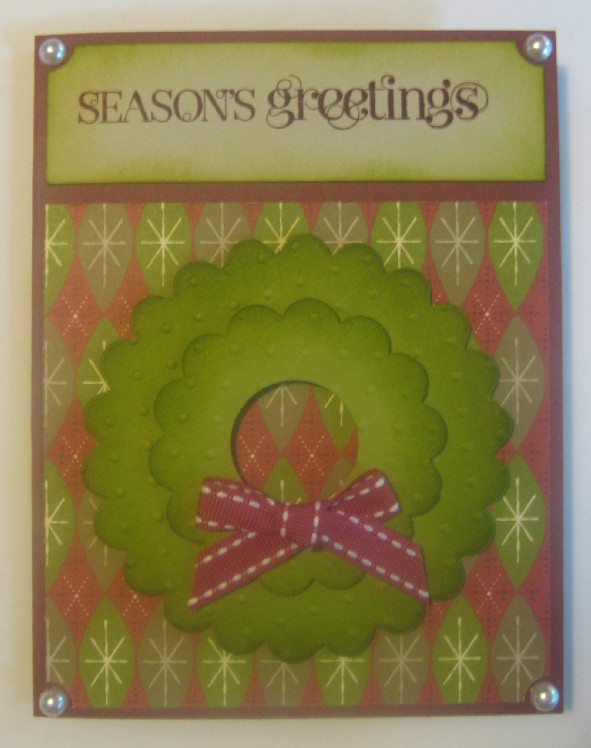
DOUBLE SCALLOPED-CIRCLE
WREATH CARD
Here is
the original prototype...
Pretty,
but I knew I wanted mine to
have more
pattern and color.
Project
Notes
for the
DOUBLE SCALLOPED-CIRCLE
WREATH CARD
Stamps • "Curly
Cute"
Papers:
• Start with a Christmassy
designer paper you'd like to use; cut at 4" X 4".
• Then
find card stock to go with that, cut to standard card size of 5.5"
X 8.5", scored at 4.25"
• Cut another piece of coordinating cardstock to go at the top (or
bottom, if you prefer), which will be 4" wide by
1-1/8" high.
• And then find a green cardstock to also coordinate with the
designer paper. Use the large circle scallop Bigz die to get
the larger wreath piece; punch the smaller inside wreath using the
large scallop circle punch, but FIRST ~ before punching, punch out
a circle in the cardstock using the 1-1/4" circle punch.
Then position the scallop circle punch evenly over the punched
circle, and punch. Run both of these through the small dots
embossing folder (or any of them that look fun!), and then sponge
the edges with the same color of ink.
Accessories:
• Pearls
• Ribbon to match
Stampin’ Up! Accessories / Tools • Big Shot Die-Cut Machine
• Scalloped Circle Bigz Die
• Small Dots Embossing Folder
Supplies to Bring
to each class:
Paper cutter
Snail adhesive
(for those
who prefer that over glue sticks)
Reading
(or
close-work)
glasses!
(A little tip... I
normally wear
2.50–2.75
reading glasses, but for
closer, more-detailed work