|
PROJECTS
for Stampers Season Class
January 2011
|
January's
Projects at-a-glance |
|
 |
|
|
 |
 |

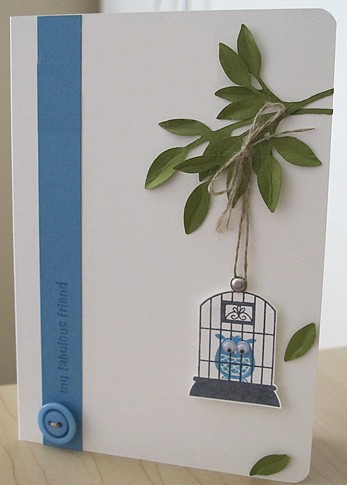
BIRD-CAGE-N-BRANCH
CARD
|
Project
Notes
  
STAMP SETS:
■
"Aviary" stamp set
■ any
stamp with a small, long sentiment (for the blue band)
CARDSTOCK:
■ White (regular size, main body of card)
■ a blue ~ to match a button and the blue
ink of the owl - 3/4" X 4.25"
■ a(ny)
green ~ for the leaves
INSTRUCTIONS/TUTORIAL:
Corner-round the two right corners of
the white CS, one thickness at a time (Punching two thicknesses at a
time will either break ~ or wear out more quickly ~ your punch. ) )
In black ink, stamp the birdcage onto
white cardstock.
Stamp the owl inside it in blue.
(Which blue you use doesn't matter; just make sure your owl, blue
band, and blue button match.)
Cut out the birdcage leaving a slight
margin all around it, and cutting off the round hanger at the top.
Position your birdcage where you want it
on the card, and lightly mark on the card where the brad or eyelet
(for the new hanger) will go.
Attach the brad or eyelet birdcage
hanger.
Note first:
~ If doing an eyelet, you can run your
linen thread through the eyelet before applying it, holding the
thread up at the top. This makes it look like the thread is
actually going through the hanger ~ because it IS!!!
~ If you're doing a brad, you can just
run the thread around it.
Punch your leaves; the Sizzix "Little
Leaves" die was used in this card; I also used the leaves (lots more
of them) in the bird punch.
Run some linen thread through the
button.
Stamp a message onto the blue band.
(vertically is how this card was done)
|
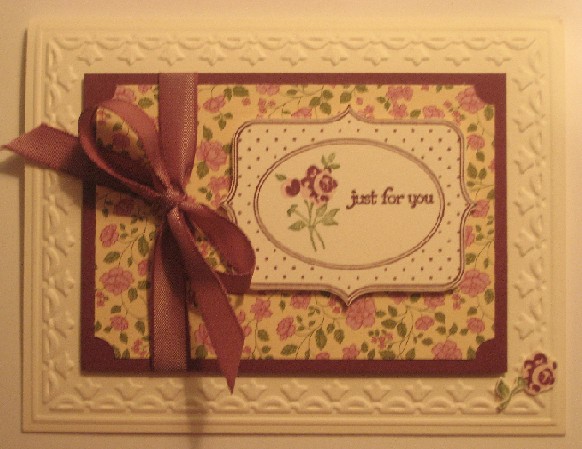
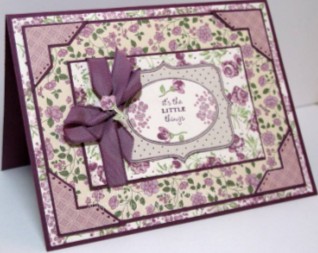
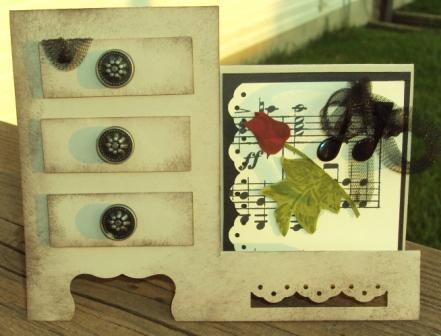
VINTAGE
ROSES
CARD
I've
got to stop taking pictures of my cards
at night
~ they always turn out kind of "golden"!!!
So yes,
this IS the card *I* made.
|
Project
Notes
STAMP SETS:
■ "Baby
Blossoms" stamp set (Since you'll be doing 2-step
stamping, the clear set is handy.)
SUPPLIES:
■ Ticket
corner punch
■ Framed
Tulips embossing folder
■ Stamp
pads: Always Artichoke, Pale Plum, Rich Razzleberry
■ Small
sharp scissors for cutting out the label (the mini Top Note)
EMBELLISHMENTS:
■ Ribbon - Rich Razzleberry taffeta - 18"
■ Optional (I didn't use, but it would be pretty to add)
tiny pearls where the ticket-corner punches are.
CARDSTOCK:
■
Springtime Vintage DP - 2-3/4"
X 4"
■ Rich Razzleberry cardstock - 3" X 4-1/4"
■ Vanilla cardstock - main card piece (you
will want to look closely at whatever DP you use to make sure that
you are matching
the
background colors ~ like this card could have had a white or
cream base card because there is none of either color in the DP.
INSTRUCTIONS/TUTORIAL:
Impress the embossing folder onto the
card, taking great care to make sure it's centered.
This may take a little practice until you figure out how to do this
in such a way that it's centered top to bottom, and left to right.
If you mess up, you can most likely just cut it out and use it as a
separate layer piece on another card. )
Punch the four corners of the DP with
the Ticket Corner punch, and adhere to the Rich Razzleberry piece.
Tie the ribbon around this piece
Adhere to the card. (No need to
pop this up with Dimensionals; I did, but then realized I actually
diminished the effect of the embossed tulips.)
Stamp the dotted mini Top Note from
"Baby Blossoms" onto Vanilla CS
Next stamp your sentiment.
Next stamp the leaves of the tiny rose
inside the oval.
And last, 2-step stamp the little roses.
Cut out this tiny Top Note piece leaving
just the tiniest edge of white all the way around. (That's
always how I do that.)
Pop up this piece with Dimensionals and
adhere to card.
(The little cut-out rose in the lower
right corner is optional; it's there for only ONE reason(!):
my card accidentally fell onto a corner of a black stamp pad(!), and
I had to cover it up somehow!!!)
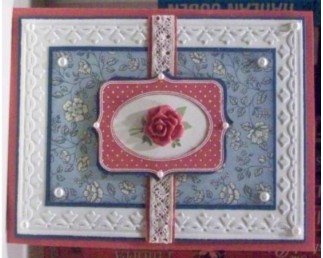
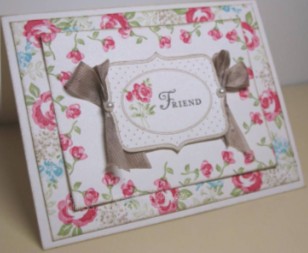
CARD PROTOTYPES:
Here are the three cards that inspired the one I made. I took
the color scheme and ribbon placement of the top one, the tulip
border and basic background format of the one on the left, and the
inside sentiment and rose of the one on the right! (On that
last one, they stamped all those roses!!! So you could
make that card without having the DP!)
|
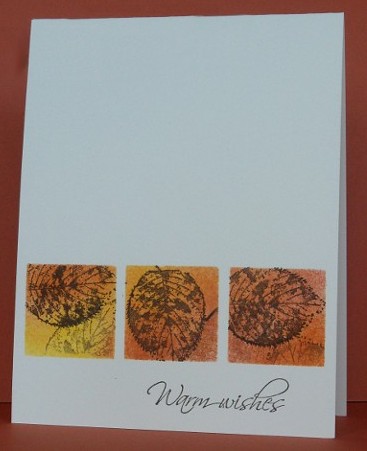
PUNCHED-N-SPONGED
WINDOW
LEAF CARD
This card is very simple and fast, yet elegant and striking.
|
Project
Notes
STAMP SETS:
■ Any
stamp set with a leaf or two that you like (The artist
of this card used just one leaf.)
■ Any
sentiment stamp you like
CARDSTOCK:
■ White - 4-1/4 X 8-1/2"; score at 5-1/2" ("Hot
dog cut")
INSTRUCTIONS/TUTORIAL:
You can make a template with three
square "windows" by punching 3 1-1/4 squares about 3/16" apart out
of paper ~ which is thinner and therefore, when you sponge, you
won't have as deep a "window" to fill. If you don't know what
I mean, try it on both CD and paper; you'll figure it out pretty
fast. However, I provided one for you in your kit.
Stamp your sentiment in the lower right
corner. If it's a shorter one like this (in the picture), then
you'll be able to line your template up with the bottom of the card.
Get any two colors of ink you like
together. If you like the above color scheme, you can use a
"yellow" ~ like So Saffron, More Mustard, etc. The other color
could be Really Rust, Cajun Craze, Pumpkin Pie, etc. We tried
them all, in various combinations, and they all looked good!
You just can't do it wrong!!
Place your 3-window template over the
card (making sure to allow a little margin above your sentiment) and
sponge the yellowish color in various random areas. Then
sponge the rusty color in other areas, merging the two, of course.
Next stamp your leaves (or whatever
image you want, really!) in black. If you want to have stamped
off images (as above), then you will need to re-ink, stamp once
"elsewhere" (on your envelope is good, putting the whole image onto
the envelope, not having part of it off the edge) and then stamp off
onto your card. (as above) You have to stamp your first
impression of the stamped-off image on a completely solid piece or
you will have an edge!
And that is IT!!!! VERY fast and
easy!!!!!!! You could do these assembly-line style and get a
bunch made up one time! You could use different stamps
and colors and make them for babies, birthdays (feminine), thank
you's, sympathy, etc.
|
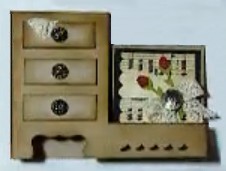
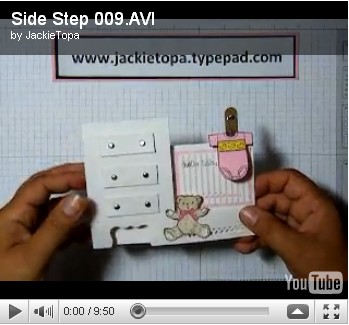
SIDE-STEP DRESSER
CARD
(This isn't the best picture, or even a picture of
one of ours ~ I had to take it off her video!
I'll get one up
soon. And if I don't, please feel free to
remind me!)
|
Project
Notes
STAMP SETS:
■ The only
stamp I used on this card was "Oval All" for the sentiment.
CARDSTOCK:
■ Main card:
Soft Suede (5.5 X 11", but DO NOT SCORE!)
■ Matt pieces for the square on the right and
the oval: Black
■
Drawers: Any lighter neutral color ~ Crumb Cake, Sahara
Sand, Very Vanilla, etc.
EMBELLISHMENTS:
■ 3 to 6 brads
for the drawer handles (depending on whether you want one drawer
handle in the middle, or one on each side)
■ "Newsprint"
DP (You could even use an actual page of sheet music!)
■ Ribbon of
your choice (in the original prototype they used lace; I tried
vanilla grosgrain but didn't
care for it, so I ended up using vanilla organdy (retired)
■ They used
lace for the bow; I used white organdy ribbon. (Taffeta or
silk would be pretty, too.)
■ Tiny silk
roses - I took mine off of a rose swag I have up in the house, but
you can use any small rose ~ silk, punched, ribbon rose, or
whatever you have on hand!
SUPPLIES:
■ Scallop (straight-edge) punch
■ Curly Label punch
■ Scalloped Oval punch
■ Large (not the biggest) Oval punch
■ Sponges for edges of drawers and dresser
■ Crumb Cake stamp pad
INSTRUCTIONS/TUTORIAL:
Click on the picture to go to the web
page where the tutorial is;
you'll still need to click on that tutorial for it to begin.
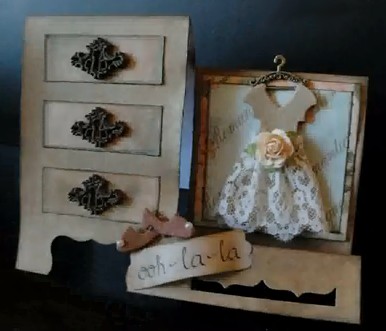
CARD PROTOTYPE: Here is the original card:
What looks like a
bit of "shine" at
the top left of
the card, is actually a tidbit of
lace hanging out
of the drawer!
OTHER VARIATIONS:
Here are some other variations of this
card. This shows how you can be very creative with whatever stamps,
ribbons, papers, and embellishments you have!!!!
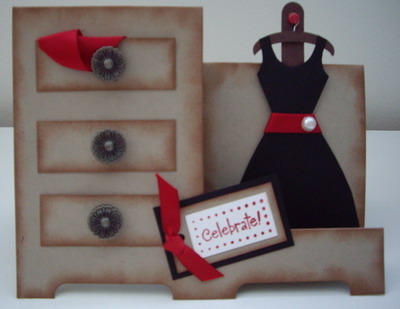
See the
May Class for BABY dresser cards!
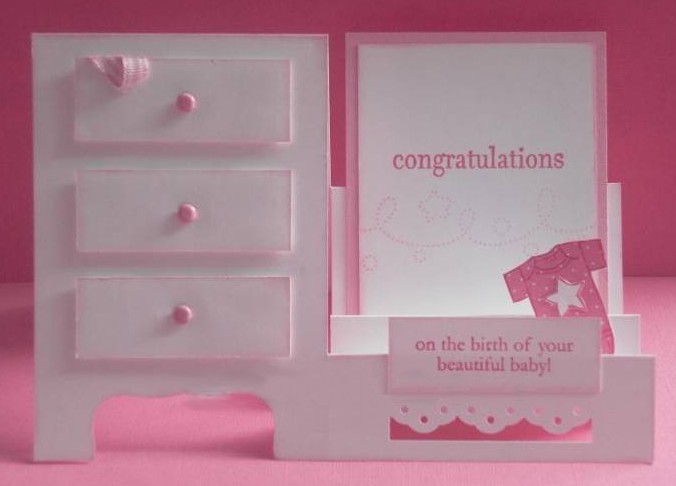
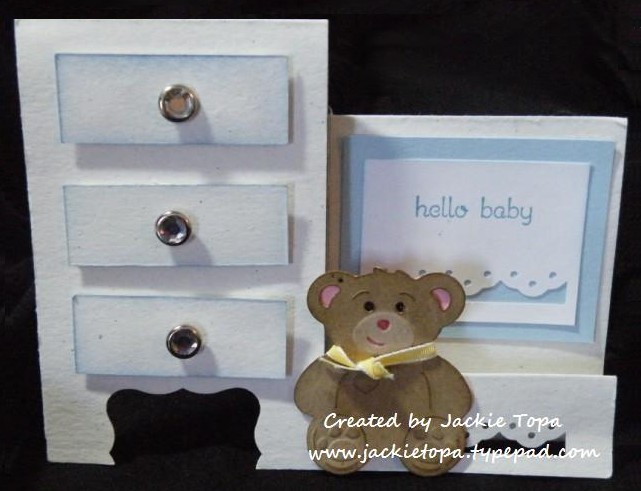
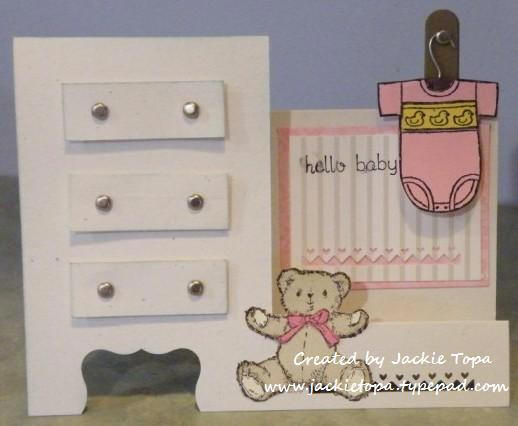
(These are not the ones we made; just samples.) |
|