|
|
 |
|
|
Homeschool
Logos, I.D. Cards,
and
School Colors!
|
|
|
|
|
|
From the "Memory Lane Archives" of the Shelton Family! |
I have also included
templates and directions for making
your own Homeschool I.D. Cards!
If you want to go directly
to that page:
![]() Click
here if you have MS
Word
Click
here if you have MS
Word
![]() Click
here if you don't.
Click
here if you don't.
(This is a Rich Text Format document that should work for
anyone. If it doesn't, I'm sorry, but I don't have
any other options for you. ![]()
If you have a suggestion for me, please let me know!)
|
I.D. Card
Here (below)
is one of the first I.D. cards I ever made ~ way back in the OLDEN days!!! Personal home computers
weren't even heard of!!! No, I used my trusty, dusty
(now; not then!) TYPEWRITER! If
it looks "off," it's only because it IS!!!
Notice anything missing below? I forgot to put her age and the date! It must have been around 1987 as she looks like she's about 11 years old.
I
did ALL of the typing below on my trusty, "one-size-font" typewriter,
reducing and enlarging the get the various type fonts. Our school
colors are black, grey and purple, which you can see in three striped that
I colored with a felt pen a third of the way down. I took the
picture of her standing in front of a blank wall in the hallway.
|
|
|
|
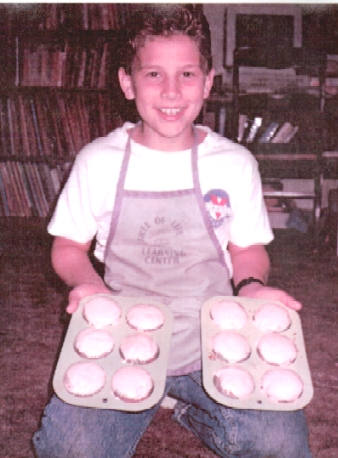
Homeschool Apron
I put one of the above-mentioned copies through the T-shirt shop's transfer-making machine, which produced a reversed T-shirt transfer that I then ironed onto an apron I made! See Tory in his apron in the picture below!
I
also made a look-alike apron for Sharnessa, a tiny one for Carlianne, and
a miniature Barbie apron! I went through the same procedure to get
the transfer, but just kept reducing it even more, until it was the size
of a postage stamp!
|
|
|
|
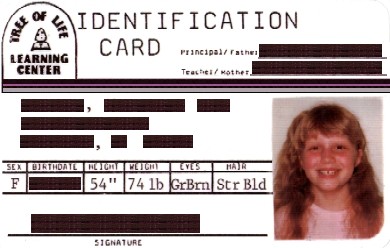
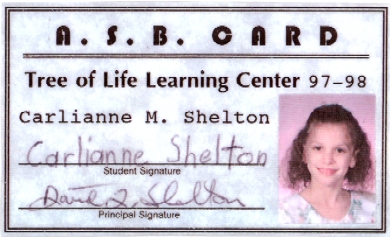
I.D. Card
And here is a later-on version of the I.D. card ~ which I called an "A.S.B. Card" at the time because that fit our purposes at the time. We needed such a card to get into Tory's basketball games, (yes, even Carlianne needed an "ASB card" to get in!*), so that's why it's not in the above full I.D. card format but, rather, is similar to a school A.S.B. (Associated Student Body) card I had seen saw somewhere. And this is all most people would really need. By now, I had entered the more "techy" age of computers, and made this on the computer.
* Why anyone would doubt Carlianne was a student and would actually need PROOF of that is beyond me, but it gave me a good excuse to make one for her! |
|
|
|
If you would like to make something similar, click here to access an MS Word document with several templates and fonts, as well as directions!
And yes ~ it's FREE!!! |
|
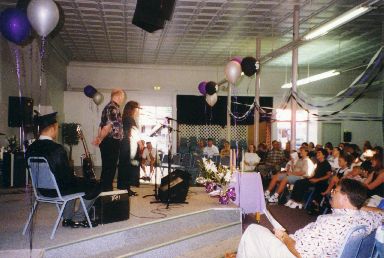
School Colors
Here's
what we did for school colors... I had Tory choose one color ~ he
chose black ~ and Sharnessa choose another ~ lavender ~ and then I chose a
coordinating color ~ grey, and those are what comprised our school's
colors! (This was several years before Carlianne even entered the
picture! You can just barely tell from the picture below, but these are the colors we used for the balloons and streamers for Tory's graduation! (For the whole story on that, click here.) |
||
|
I (Barb) am at the podium speaking, with Dave directly behind me (ready to speak next). Tory is seated, to the left in the blue chair, in cap and gown. |
|
~ More ID Card Ideas ~
from my dear friend, Amy Beckel!
It's kind of fun to
get ideas from several sources! Anyway, after planning for years to make ID
cards for my children, I finally got around to it last month, and they turned out really cute.
Next time I might put the "school year" on as well, and make sure that the photos are smaller so there's more room
for the signature. AND next time I'll make some cute bookmarks right on the
same piece of cardstock... rubber stamp them or something... before getting
it laminated. That way I won't have to throw away those nice scraps of laminated cardstock.
Amy
|
Click here to go to a Word
document of the I.D. Card Templates
that you can customize and print
out ~ to make your own!
Go to the Homeschool Oasis Article Chart
I got this background at:
![]()